January 31, 2011

1/2 Bath: The Best of Both Worlds

Happy Monday to everyone!

I want to say a big thank you to all of you who left thoughts/comments on this Post last Thursday regarding the lighting dilemma in our 1/2 bath remodel project. Your insight was very helpful. And to give you an update, we have made a decision on our plan of action!

Drum roll please...

Joey concluded that he wanted to "take on the challenge" of re-doing the electrical wiring in this 1/2 bath, and as a result, we will have a separate light fixture over our sink/mirror and then a vent-fan on the ceiling with a separate switch to operate each of them. Whew! Problem solved!

With that said, I will inform you that this was NOT an easy task. Joey (mostly) completed the project on Saturday, but throughout the day, I heard a lot of huffing and puffing and grunting and groaning coming from this tiny bathroom. But Joey wasn't going to let old, crumbling plaster walls get the best of him. He mastered the task and we now have new electric hook-ups in these old walls.

Here are a few quick shots of the progress.

This is the little hole on the wall where the vanity light fixture will go...


Here is the hole in the ceiling with the vent-fan now installed (fan cover still has to go on after the painting is done)...


And here is our lovely set of dual-light switches and new outlet. In case you are wondering why there is plywood surrounding this area, well, that would due to the aforementioned crumbling plaster issue. But this will all be covered up in the end. So, the plywood won't matter.


Here is the vent cover that needs to go on the ceiling, but it's gonna get a paint job first!


And here is a picture of the vanity light fixture we ordered online from Master Faucet. We're going with a "square" theme in this bathroom (which you'll see as we get closer to the end results) and this light fixture fit the bill. It also has a craftsman-era vibe which works with our bungalow-style house really well. The polished chrome modernizes it a bit.


So, progress is being made! Only 5 days to go until Saturday, and we are right on target to meet that deadline.

PLUS we may get some bonus time at home this week if we get the "blizzard" that's being projected for the Midwest. Up to 24 inches of snow? Being stranded at home to do endless projects and sleep in and stay in my sweats all day? Yes, please!

More to come... Pin It

January 28, 2011

1/2 Bath Prep Work

In spite of some indecision regarding the finishing details of our 1/2 bath remodel project, work continues to progress! Now that the majority of the demolition is complete, we can begin the process of putting the bathroom back together - starting with prepping the walls and trim.

Joey removed a very old medicine cabinet from the wall of the bathroom, which left a big, gaping hole in it's place. The medicine cabinet was on the wall opposite the sink and toilet. We do not want to use this area for a medicine cabinet anymore. So, the hole has to be filled in with drywall.


To do this, Joey took some 2X4 boards and screwed them into the frame of the opening. This gave him a solid foundation for screwing in the new drywall he had cut to fit.


Once the drywall was in place, he had to tape the seams and mud over it. This involves a little finesse to get it sanded smooth and make the wall feel seamless for painting. Joey is actually skim-coating the entire upper 1/3 of all the walls in the bathroom to make them all smooth. The walls are very old plaster and were never really finished for painting as they've always had wallpaper covering them. And we don't want heavily textured walls. So, the skim-coating will smooth everything out. The bottom 2/3 of the wall (where the plastic tiles used to be), will be covered differently - more on that later.


While Joey has been working on the walls, I have been painting trim boards for the bathroom. Joey set me up in the basement - laying the boards across 2 different sets of saw horses. The boards are select pine that we purchased them at Menards (select = higher quality wood with no knots). The boards came unfinished, and we are painting them white to match the white trim in the majority of the house.


Rather than buying what would normally be used for base and crown molding, we took a slightly different approach by purchasing these square shaped boards in 3 different widths. The trim will look very streamlined and will actually match what we used on our 3-seasons porch that we remodeled last summer.


Why 3 different widths? Well, the widest boards (1X6) will be used as the base molding. The 2nd widest (1X4) will be go along the very top of the wall to act as crown molding. The smallest width boards (1X3) will actually go around the room about 2/3 of the way up the walls (kind of like a chair rail).

What's next?

Here's a hint: the tile has arrived!


Hello, weekend! We have work to do!!! Pin It

January 27, 2011

Preference Poll: 1/2 Bath Lighting

Joey and I are having a small disagreement regarinding the light fixture we should buy for the 1/2 bath we're remodeling. Currently there is a light fixture on the ceiling. It's super ugly and coming down...


Joey really doesn't want to have to re-do any of the electrical wires in the room, which would be required in order to put a vanity light above the sink/mirror. So, we are going to stick with keeping the lighting on the ceiling and just buy a new fixture. Seems easy, right?

Wrong.

Here is the dilemma. Joey wants a light/fan combo for this bathroom. He said having a vent-fan is a necessity in any bathroom (even a 1/2 bath). Normally this wouldn't make any difference to me, but it does in this case for 2 reasons:


  1. Since there will not be a vanity light, I want the ceiling light to be somewhat decorative or at interesting. But every single light/fan combo that I have looked at in your typical home improvement stores (Lowes, Menards, Home Depot) and even online are very plain/ordinary and many are ugly. There is not much to choose from. This is the best I could find - and it's pretty, but I feel like I see this same type of light fixture everywhere.


    Whereas, here is a light-only fixture from Home Depot. It is VERY inexpensive ($25), but has a bit more interest and detail than the one above. It's unique.


    Note: we are painting the ceiling a color, so the white fixture will stand out against it.

  2. There is currently only 1 light switch in the bathroom. Again, since Joey doesn't want to re-do electrical wiring, the light and fan would be on the same switch, which would mean any time the light is on, the fan is on too. I don't like this either. I want to be able to have light-only when needed.


So, what do we conclude? We will probably get a light-only fixture. There is a window in the bathroom that can be cracked if we need to air out the room(if you know what I mean).

But what would you choose if you were us?
  1. Light only?

  2. Light/Fan Combo?

  3. Break out the time/effort/mess/money and re-do the electrical to have a vent-fan on the ceiling and a vanity light over the sink and mirror?


Please share! Pin It

January 26, 2011

From Christmas to Winter

I took a stab at rearranging the built-in bookshelves in our living room the other night. I removed all of the Christmas decor a couple weeks ago, but hadn't really put any other decor up in its place. So, the shelves looked very blah. I wanted to spruce them up with a winter-ish theme that would last through the remainder of January and most of February (thanks to our loooong Wisconsin winters).

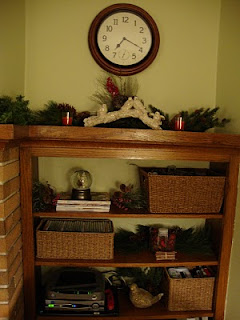
Here is what the bookcase looked like around Christmastime - a mostly red and green color scheme along with some pine boughs for that Christmas feel ...


To give a fresh, non-Christmas look to the shelves, I took all the red color out of the picture. I decided on a mostly green, brown, and white color scheme, which ties in with the colors of the room anyway. I wanted to use some natural elements for a winter-y, outdoors-y feel. I also wanted the space to have a simpler look with less clutter. Here's what I came up with...


I kept the baskets on the shelves since they have the useful purpose of holding blu-rays, video game equipment etc. but then added a few new items around the baskets.

The tall hurricane on the top shelf (seen above) has faux snow and pinecones in the bottom. The snow sparkles like real winter snow.

The white bird figurine also has faux snow on it. I love birds. But most of you know that.


On the 2nd shelf, I have a little Pottery Barn love going on. I stacked several PB magazines together and sat a small glass hurricane (purchased from PB) on top of them for some height variation. Then I placed 2 birch candles (also purchased at PB) on either side. I put more faux snow in the hurricane. The green votive candle in the center coordinates with the green pillar candle in the hurricane on the top shelf.


The 3rd shelf is a tribute to Pottery Barn as well (I guess I'm storing up a nice collection of usable goods from there). The white lantern and little nest I just bought and shared with you in a post last week. The bird candle sitting in the nest was purchased before Christmas.


Notice on most shelves, I have groupings of 3 - this keeps things balanced and interesting without looking too cluttered.

So, what do you think? Successful transition from Christmas to Winter?


This built-in bookcase is always a work in progress. The bottom 2 shelves are not very pretty since we have electronic equipment (receiver, cable box, blu-ray player, X-box, and Wii) sitting on the shelves. So, I try to balance it with some pretty decorations on the top shelves. We'll see how this transforms over time. I learn as I go!

I must admit that I'm pumped for spring and can't wait to bust out those decorations. But for now, winter is all we got!

Pin It

January 25, 2011

1/2 Bath Demo Time (For Real)

As mentioned in this post the other day, we are movin' along our 2011 to-do list and are going to start renovating the1/2 Bath on the first floor of our house. Since we have a goal of completing the renovation by February 5th, we wasted no time getting to work! And Joey started this work by completing the demolition that needed to be done before all the new stuff goes up. (Click here for the early demo done last summer.)

In case you are wondering what I was doing while Joey worked away at destroying this tiny room, I was cleaning up the layers of dirt and dust left all over the first floor of the house from this process (*sigh*).

I'll give Joey credit that he tried to keep the dust contained in the bathroom by hanging/taping plastic in the doorway, but dust manages to find it's way out and about somehow! Sneaky little thing dust is...


Looking at the picture above, I can hear the Wizard of Oz with his booming voice saying, "PAY NO ATTENTION TO THAT [BATHROOM] BEHIND THE CURTAIN!" At least, that's what I wanted to say to the guests we had over this weekend.

Anyway, to begin the demolition, Joey removed the toilet - which is original to the house (that makes it about 82 years old... I clean it often) - so that he could break up the tile on the floor. The sink "floats" on the wall, so that wasn't in the way of the floor and was left in place for the moment.


We (well, I) considered getting a new toilet for our "new" bathroom, but decided that this old toilet was piece of our house's history that we (well, Joey) just couldn't let go. So, the toilet is here to stay and will be re-installed in the end. So, for now, it sits in a little plastic tub out of the way.


Let it be known that we are officially down to 1 toilet in the house. May there be no crises between now and February 5th (*cross your fingers*)...

Next comes the destruction of the tile floor. According to Joey, he used something called a Rotary Hammer. He bought it the other week from Home Depot as a combo pack with a free angle grinder (don't ask me what this is for, I have no idea).


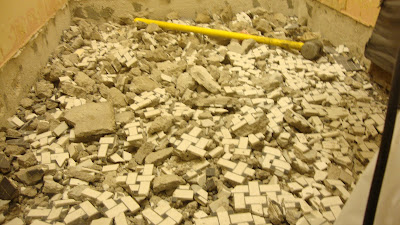
The rotary hammer (along with a sledge hammer) is what Joey used to (loudly) pound out the rest of the tile - and all the flooring underneath the tile.


In case you questioned why I had dust all over the place...


The floor became a giant pile of rubble that got dumped into many large trash bags. I wish our garbage men well as they toss these bags into the truck.


A shovel was used to scoop it all up and Joey sweeped it out and used the shop vac for an extra clean feel.


And here are the "final" demo results... You can see the sub-floor planks where you can peek into the basement (which, by the way, allowed A LOT of rubble and dust to fall into our basement - Joey cleaned that part!). Joey also removed the sink from the wall after I convinced him that we needed a new sink. I caved with the 82 year old toilet. I was not sticking with the 82 year old sink.


Joey even managed to get plywood down and the durock down in preparation for laying new tile, which has been ordered but hasn't arrived. The old medicine cabinet came out too.


Well, that takes us through our messy weekend. More to come this week! Pin It

January 24, 2011

Organization Eye Candy

It was a C-R-A-Z-Y weekend in the Yonke villa! Just for the record, I'm a Packers fan and Joey's a Bears fan. We all know how that went down this weekend! I'm a happy camper.


Moving right along...
Need some motivation getting organized this January? Check out this fabulous Organization Challenge by The CSI Project!

The challenge was for readers (anyone) to post pictures showing the tips, tricks, cool products, etc. to keep their households organized. Then a winner was selected and given a prize. As I was scrolling through some of the entries, I found myself drooling over some of the before and after pictures people were posting.

Here is just a sample of the Before & After shots out of the 127 (!) entries...


Our Fifth House: The Master Closet


GoogieMomma: Hallway Hotness


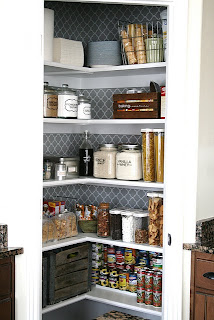
House of Smiths: Kitchen Pantry Makeover


Beneath My Heart: Craft Closet Makeover


Keep Home Simple: New and Improved Hallway Closet


Until Tomorrow, Val: Mission Organization - Linen Closet


The Decor Chick: The Great Pantry Makeover


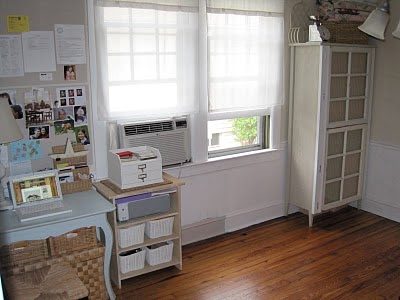
The Stucco Bungalow: A Family Workspace


And the winner (*Spoiler Alert*)...


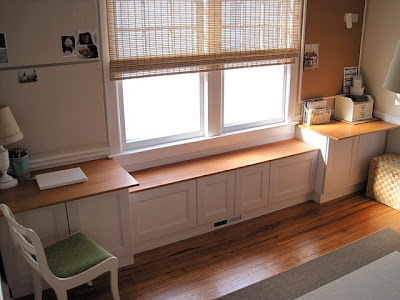
Love of Family & Home: Closet Turned Home Office


So much creativity! I love it! And there were far more details about all these organization projects on the individual websites.

Stenciling has become the new hot trend - as seen in several of these photos - especially as an added detail in tight spaces like closets, open shelving, laundry rooms, and accent walls.

The CSI Project is having a Valentine’s Day Challenge this week. I might have to enter one of these challenges someday... Pin It
Visit InfoServe for Blogger backgrounds.