This is it. My sixth (!) and final post on this new carpet we installed last week. Don’t cry. I’m sure you’ll see many more home pictures with the carpet in them. Ha!
To wrap things up, I just want to post a few detailed (aka random) pictures of the hallways and staircase - to show you the quirky things I LOVE about this new carpet in particular. I may toss in a little Q&A to explain the method behind our madness. And I’ll have some final Before & After shots to display the difference in the look and feel of the spaces. So, hold on to your hats folks, we’re going for a looong ride.
To start out, I’m actually going to address the Q&A segment. In reality, it’s just one question with multiple answers. If you don’t want to read our reasons for why we did what we did, feel free to skip down to the pictures below.
Question: WHY would we possibly want to cover up hardwood floors in the bedrooms and hallways and stairs with carpet? Aren’t most people ripping out carpet to install hardwood floors?
Answer(s):
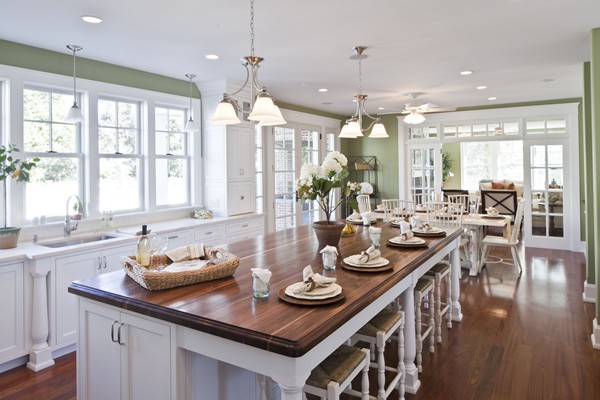
- These floors were covered in shag carpet for 30 years before we bought the house. They are roughly 80 years old and not in the best of shape. While we were willing to bite the bullet and pay to have the hardwood floors in the living room, den, and dining room refinished (seen here), we just aren’t willing to put the cost into all that would go into refinishing the rest of the house. We do plan to refinish the hardwoods in our Master Bedroom in the next couple years – possibly a DIY job, but the cost savings of carpet elsewhere was a big incentive to us. And to top it all off, the floors in the halls and the stairs had 2 different stains on them plus some paint. A nightmare.
- Since we ripped said 30-year-old shag carpet up within a week of purchasing the house, but didn’t lay new carpet until now, we’ve actually lived in a house with ONLY hardwood floors for 21 months. This has been a blessing because it has actually revealed to me why I don’t love having just hardwood floors:
- Maintenance of cleaning (vacuuming and washing) all the floors on a regular basis. The baseboards also get extra dirty/dusty without carpet to grab some of it.
- The loudness of pounding footsteps when people walk around and go up/down stairs.
- Echoing voices/noises because we don’t have enough textiles to absorb sound.
- Cold feet in the winter (yes, the hardwood floors get cold in this old house).
- I want our future babies/children to have some soft space to crawl/walk/play. And if an accident happens (like falling down the stairs), cushioned carpet is a safer way to go.
- The first floor rooms have a variety of flooring as is (old hardwoods, new hardwoods, tile) and the hallway is right in the middle. Carpet was the only way to marry it all together.
These are the TOP reasons for our carpet choice. Carpet may not be what everyone else would choose, but it’s perfect for us and our current life circumstances.
Now, on to some detailed pics of halls and stairs to show what I love and why. We went with a very low pile carpet on purpose because we knew the carpet would butt up against hardwoods in other areas and we didn’t want there to be a big “bump”. Here’s the view from the kitchen into the hallway…

The carpet makes the hardwoods look more polished. More finished. Better.
And here’s the reverse view from the living room to the hallway…

The new hardwood floors in the kitchen are completely different than the old oak floors in the living room, but you don’t notice the difference as much with the carpet in the middle. It would have been terribly obvious if the two floors had met together had we gone with refinishing them in the hallway.

Underneath the built-ins in the hallway is on old air return. The grate must have been bigger at one point because there’s actually plywood in front it (that we would have needed to patch if we had refinished the floors). The carpet helps it look better.

I may eventually paint the grate white. You don’t really see underneath the built-in unless you get on your knees (or you’re a cat that crawls into tight places). Pardon the dust…

The tile in the bathroom looks nice against the carpet too. Since the tile is meant to look like a wood floor, it also would have looked strange against the oak floors in the hallway.

Next up, the stairs. We chose not to have a “runner” look but instead to have the carpet go all the way to the wall on the right side, but stay about an inch off the spindles on the left side. Practicality drove that decision. As much as I love design, my logical mind takes over sometimes.

I’m very glad we painted the ends of the treads and the spindles white. This enhances the beauty of the old the stairs. The contrast between the white paint and dark carpet is nice and adds visual interest. And the carpet guys did a nice job wrapping the carpet around the front of the treads.

Here you can see the spacing between the carpet and the spindles – an even amount on either side…

Don’t ask me why, but I love the landing on the stairs even more than before. It just looks so fresh and so clean, clean (name that song).

I can’t wait to dress up the walls of this area. It’s the “focal point” of the staircase. I’m collecting ideas via Pinterest (of course)…

You can see below our icky Master Bedroom floors next to the new carpet. It will be nice when we can refinish these hardwoods.

As I said, the hallway layout of our house is such that it just makes sense to put carpet in the space. It runs right down the middle of the house with an entrance into EVERY SINGLE ROOM. Not joking. The only room the hallway doesn’t touch is the den, which is connected by the living room. Otherwise, the hallway joins everything else together. And in the almost-two weeks we’ve lived with the new carpet, I continue to love this decision more and more every day. It solves all the problems I mentioned above. It was worth every penny.
Lastly, here are a few Before & After pictures.


I realize these aren’t the greatest pictures, but I hope they convey the big difference we feel in the rooms. And minus a little touch up painting that’s needed, it’s FINALLY time for the fun stuff – arrange furniture, hang curtains, and decorate walls. This, my friends, will be a long, large task, but I will enjoy every minute of it!
Note: If you missed the previous carpet posts, you can check them out here, here, here, here, and here.